Author Archives: Steve Quenette

How do I use a DPU as NIC?


Introduction

In this series we are exploring the Nvidia BlueField 2 DPUs (Data Processing Units). We predict that before too long, DPUs will be pervasive in the datacenter, where many users will be using DPUs without realising. This series is for data centre, cloud and HPC builders, who seek to understand and master DPUs for themselves. Most will use DPUs via software some other company has written (e.g. your favourite cybersecurity software). However, some will encode some business critical function (like encryption) onto DPUs, ensuring the users have no idea (no performance loss, no need to learn anything). Check out Steve’s GTC 2021 talk – “Securing Health Records for Innovative Use with Morpheus and DPUs” for a good introduction to DPUs for this series.

For the purposes of this series, our goal is to offload encryption from virtual machines running on each host onto the DPUs. This has two important benefits:

  1. Eliminates the need for VM users (researchers in our context) to add transport layer security themselves, creating a lower level of entry knowledge required for them to do their work breaking down the technical barrier.
  2. Achieves higher work / processing throughput as the security work is offloaded from the CPU itself.

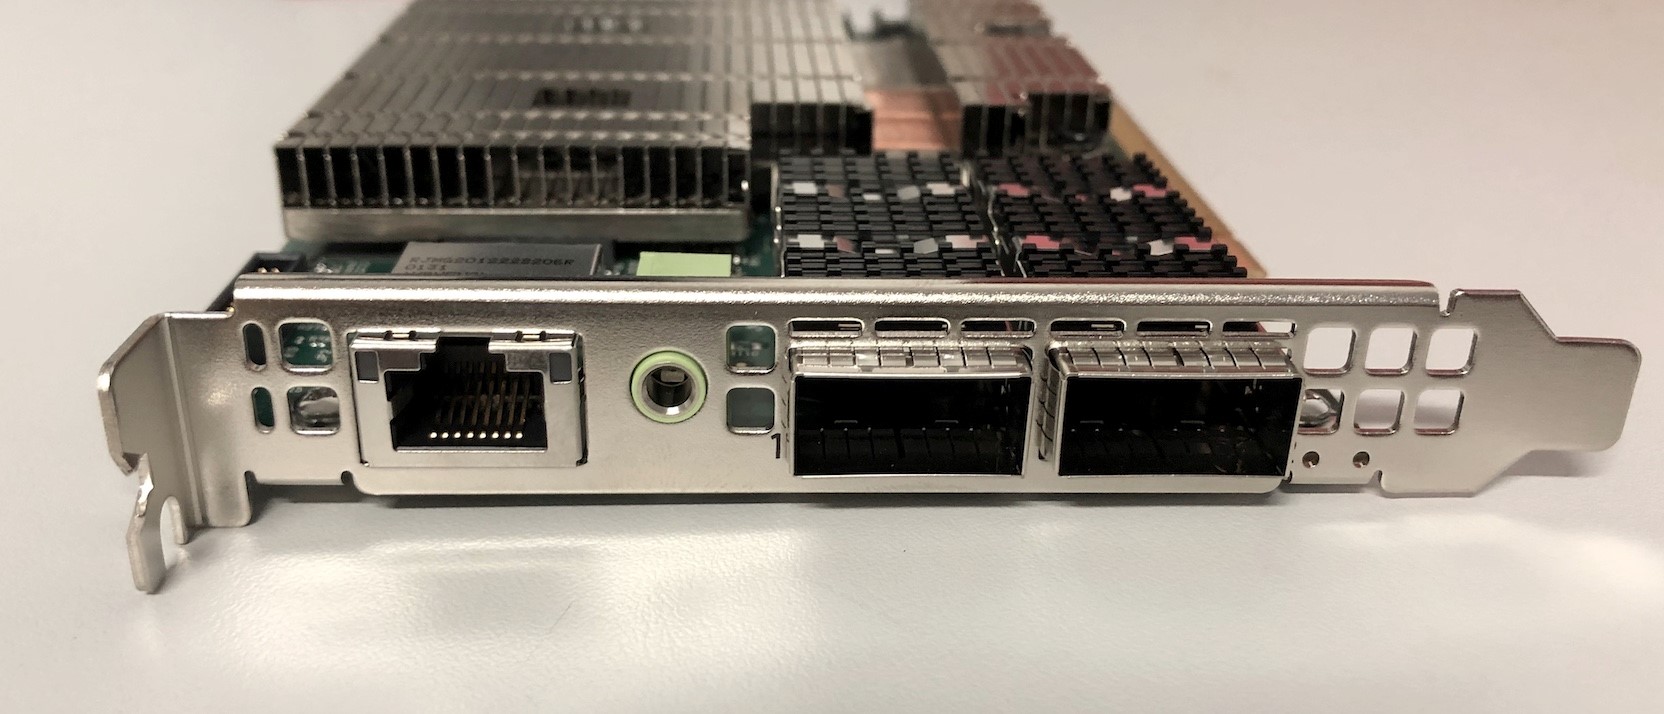
A DPU is specialised programmable hardware for data processing outside of the CPU, but still on the server. The DPUs contain their own CPU, some accelerators (e.g. for encrypting), a NIC and can be programmed to behave differently depending on your needs.

A photo of one of our DPUs

In this blog we are looking at the most basic functionality: configuring DPUs as NICs for communication between two hosts. We’ve compiled some steps and a list of some of the things that caught us out. Each of these steps were run on both hosts unless otherwise noted.

By default the DPU should act like a NIC out of the box. However it may have already been used for something else. Sometimes the DPU will be loaded with the image you want… sometimes it won’t. Hence we will assume we will need a fresh start to work from.  If you are anything like us, you’re using a pair of Ubuntu 20.04.3 LTS installations running on Dell servers with a mix of brand new DPUs and older DPUs.

Glossary of terms:
DOCA = Data Center-on-a-Chip Architecture
DPU = Data Processing Unit 
NIC = Network Interface Card
OVS = Open Virtual Switch (also known as Open vSwitch)

What are we trying to achieve?

In the logical (OVS) diagram provided by Nvidia we see that inside the DPU, the physical port connects to the p0 interface which is forwarded to the pf0hp0, which then appears inside the host as the PF0 interface. In the diagram below we see two of the modes the DPU can run.

The “Fast Path” mode bypasses the DPU processors. Conversely the “Slow Path” will  use the DPU’s processors. Our understanding is that all new connections first occur through the Slow Path. Then if the DPU is configured to behave as a NIC, the E-Switch knows it can bypass the DPU processors themselves. The Slow Path is the stepping stone to doing much more interesting things.

Source: Nvidia (https://docs.nvidia.com/doca/sdk/l4-ovs-firewall/index.html)

See our practical implementation for the simple DPU as a NIC case below. We keep the eth0 interfaces of the host connected to a switch for management purposes. The p1p1 (PF0) interfaces of the Bluefield 2 DPU cards are connected directly to each other.

Diagram of how our machines are connected.

Installing drivers, flashing the device (and installing DOCA via the NVIDIA SDK manager)

Once the DPU is installed in a PCI slot in your host machine you’ll probably want to install drivers and connect to the DPU.

DPU usually comes with Ubuntu OS installed as default. In that case we just need to install a MOFED driver on the host to be able to use the DPU.

If you want to reimage the operating system of the DPU, you will need the NVIDIA DOCA SDK installed via the NVIDIA SDK manager.

Additional information about setting up the NVIDIA SDK manager on the host can be found at: https://developer.nvidia.com/networking/doca/getting-started

In our case this meant installing the latest version of DOCA for Ubuntu 20.04.

First we downloaded the sdkmanager_1.7.2-9007_amd64.deb package and transferred it to the host. To download this file you need to be logged in to Nvidia’s dev portal so it’s best to do this from a browser)

sudo dpkg -i sdkmanager_1.7.2-9007_amd64.deb
#If you get dependency errors run the following
sudo apt-get update && sudo apt-get upgrade
sudo apt-get -f install
sudo apt-get install libxss1
sudo apt-get install docker
sudo dpkg -i sdkmanager_1.7.2-9007_amd64.deb
#Then confirm that you have the latest version with
sudo apt install sdkmanager -y
#Then run the sdkmanager
sdkmanager 

On the first run you will need to log in to NVIDIA’s devzone services (the sdkmanager tool prompts you to log in to a website and enter a code / scan a QR code).
We opted to use X11 forwarding to log in via the GUI.

Further information about this process can be found at:

https://docs.nvidia.com/sdk-manager/download-run-sdkm/index.html#login

Once the NVIDIA SDK manager has been installed you can install the drivers and flash the DPU using the following command:

#Note if you have a previous version of DOCA installed you can uninstall it using this command
sdkmanager --cli uninstall --logintype devzone --product DOCA --version 1.1 --targetos Linux --host


#(Re)installing DOCA
sdkmanager --cli install --logintype devzone --product DOCA --version 1.1.1 --targetos Linux --host --target BLUEFIELD2_DPU_TARGETS --flash all

#Note: Default username on the DPU is: ubuntu

On the first run you will need to log in to NVIDIA’s devzone services (the sdkmanager tool prompts you to log in to a website and enter a code / scan a QR code). Further information about this process can be found at: https://docs.nvidia.com/doca/sdk/installation-guide/index.html

A successful NVIDIA DOCA SDK installation (note newer versions look different)

Once the DPU has been successfully flashed you will need to reboot the host to ensure the new interfaces (p1p1 and p1p2) are present.

Note: We renamed the interfaces to p1p1 and p1p2 so that it is easier to remember and use in configuration management

#On both Hosts
sudo reboot
#Once they reboot check that p1p1 and p1p2 are present in
ip a 

You should see something like this in: ip link show

6: p1p1: <BROADCAST,MULTICAST,UP,LOWER_UP> mtu 1500 qdisc mq state UP mode DEFAULT group default qlen 1000
    link/ether 0c:42:a1:e7:1e:b2 brd ff:ff:ff:ff:ff:ff
7: p1p2: <BROADCAST,MULTICAST,UP,LOWER_UP> mtu 1500 qdisc mq state UP mode DEFAULT group default qlen 1000
    link/ether 0c:42:a1:e7:1e:b3 brd ff:ff:ff:ff:ff:ff

There should also be management and rshim interfaces of the DPU present.

10: enp66s0f0v0: <BROADCAST,MULTICAST> mtu 1500 qdisc noop state DOWN mode DEFAULT group default qlen 1000
    link/ether ca:29:81:20:cb:51 brd ff:ff:ff:ff:ff:ff
13: tmfifo_net0: <BROADCAST,MULTICAST,UP,LOWER_UP> mtu 1500 qdisc fq_codel state UNKNOWN mode DEFAULT group default qlen 1000
    link/ether 00:1a:ca:ff:ff:02 brd ff:ff:ff:ff:ff:ff

You can verify the drivers and firmware that are installed by using the command: 

ethtool -i  p1p1

ubuntu@HOST-17:~$ ethtool -i p1p1
driver: mlx5_core
version: 5.5-1.0.3 ← Mellanox ofed driver version
firmware-version: 24.32.1010 (MT_0000000561) ← Firmware version of DPU
expansion-rom-version:
bus-info: 0000:42:00.0
supports-statistics: yes
supports-test: yes
supports-eeprom-access: no
supports-register-dump: no
supports-priv-flags: yes

Connecting to DPU 

Now that DOCA has been installed and the DPU has been flashed with the firmware, we can connect to the DPU. In our case here we configure an ip address at the rshim interface to access DPU.

 ip addr add 192.168.100.1/24 dev tmfifo_net0

9: tmfifo_net0: <BROADCAST,MULTICAST,UP,LOWER_UP> mtu 1500 qdisc fq_codel state UNKNOWN group default qlen 1000
    link/ether 00:1a:ca:ff:ff:02 brd ff:ff:ff:ff:ff:ff
    inet 192.168.100.1/24 scope global tmfifo_net0
       valid_lft forever preferred_lft forever
    inet6 fe80::21a:caff:feff:ff02/64 scope link
       valid_lft forever preferred_lft forever

We access DPU via ssh from the Host, but other methods of connecting are listed here: https://docs.mellanox.com/display/MFTV4120/Remote+Access+to+Mellanox+Devices 

#Connect to the DPU from the Host
ssh ubuntu@192.168.100.2

#To check the driver and firmware (on the DPU)
ethtool -i p0

#Query from flint (On the DPU)
sudo flint -d /dev/mst/mt41686_pciconf0 q

#Check default OVS configuration (On the DPU)
sudo ovs-vsctl show

The query from flint should look something like this on the DPU:

ubuntu@localhost:~$ sudoflint -d /dev/mst/mt41686_pciconf0 q
Image type: FS4
FW Version: 24.32.1010
FW Release Date: 1.12.2021
Product Version: 24.32.1010
Rom Info: type=UEFI Virtio net version=21.2.10 cpu=AMD64
type=UEFI Virtio blk version=22.2.10 cpu=AMD64
type=UEFI version=14.25.17 cpu=AMD64,AARCH64
type=PXE version=3.6.502 cpu=AMD64
Description: UID GuidsNumber
Base GUID: 0c42a10300e71eb2 12
Base MAC: 0c42a1e71eb2 12
Image VSD: N/A
Device VSD: N/A
PSID: MT_0000000561
Security Attributes: N/A

The default config of OVS should look something like this on the DPU:

ubuntu@localhost:~$ sudo  ovs-vsctl show
10c2d713-1ca3-4106-8eea-1178f3c1348d
    Bridge ovsbr1
        Port p0
            Interface p0
        Port pf0hpf
            Interface pf0hpf
        Port ovsbr1
            Interface ovsbr1
                type: internal
    Bridge ovsbr2
        Port p1
            Interface p1
        Port pf1hpf
            Interface pf1hpf
        Port ovsbr2
            Interface ovsbr2
                type: internal
    ovs_version: "2.14.1"

Thanks to the default OVS (Open Virtual Switch) configuration you can also add IP addresses to the p1p1 interfaces on the hosts to enable connection between them.

#On Host-16
sudo ip addr add 10.10.10.16/24 p1p1
sudo ip link set p1p1 up
#On Host-17
sudo ip addr add 10.10.10.17/24 p1p1
sudo ip link set p1p1 up
ping -I p1p1 10.10.10.16

Troubleshooting:

If your OVS configuration does not match the example or the ping test fails, you might want to try removing all existing OVS configurations using the “ovs-vsctl del-br“

For example if you had a bridge called “arm-ovs” you could delete it with the following command

sudo ovs-vsctl del-br arm-ovs

Then recreate the default OVS bridges ovsbr1 and ovsbr2 with the following commands:

ovs-vsctl add-br ovsbr1
ovs-vsctl add-port ovsbr1 pf0hpf
ovs-vsctl add-port ovsbr1 p0

# configure p1p2 (optional in our case, p1p2 is not used)
ovs-vsctl add-br ovsbr2
ovs-vsctl add-port ovsbr2 pf1hpf
ovs-vsctl add-port ovsbr2 p1

ip link set dev ovsbr1 up
ip link set dev ovsbr2 up

Important note: Adding p0 and p1 of DPU to the same ovs bridge could cause a loop and potentially create a multicast issue in the network.

Some observations, noting we’re dealing with very new technology:

  1. Installing DOCA sdk via the command line is not yet simple.
  2. Sometimes DOCA install  may fail and trying it again usually works. (Note: The newest version “1.2.0” does not seem to have this issue)
  3. To be able to use both ports of the DPU, we observe they need to be configured with IP addresses of the different vlan on the host.

Conclusion

Once the DPUs have been installed and flashed correctly you can easily add IP addresses to the p1p1 interfaces on the hosts to enable network configuration. In the next post we’ll look at the NVIDIA DOCA East-West Overlay Encryption Reference Application.

Written by Ben Boreham, Swe Aung and Steve Quenette as part of a partnership between Nvidia, the Australian Research Data Commons (ARDC), and Monash University

2nd place in the SC21 Indy Student Cluster Competition

Six Monash University students have taken 2nd prize in the SuperComputing 2021 Indy Student Cluster Competition (IndySCC).

The IndySCC is a 48 hour contest where students run a range of benchmarking software (this year – HPL and HPCG), well established scientific applications (Gromacs, John The Ripper) and a mystery program (Devito), whilst also keeping power consumption to under 1.1KW. That’s right – even the most advanced digital research infrastructure has meaningful Net Zero aspirations!

The six students – the Student Cluster Team – are part of an undergraduate team called Deep Neuron. Deep Neuron itself is part of a larger group of Engineering Teams that offer a range of extra-curricular activities. DeepNeuron is focused on improving the world through the combination of Artificial Intelligence (AI) and High-Performance Computing (HPC).

“The experience of participating in such a well known competition and the opportunity to collaborate with different students and experts allowed us to learn valuable skills outside of our classroom. We feel privileged and would like to thank all the support from DeepNeuron, supervisors and the faculty”

Yusuke Miyashita, HPC Lead, Deep Neuron

This achievement is even more impressive given that the students have never physically met each other due to covid restrictions. Earlier this year, the students also entered the Asia Supercomputing Community 2021 virtual Student Cluster Competition (ASC21 SCC), where they won the Application Innovation Award (shared with Tsinghua University) for the fastest time for the Mystery Application. That team was led by Emily Trau, who also works as a casual at MeRC.

“Despite the COVID lockdown, the students from Monash University’s Deep Neuron have hit well above their weight, winning significant prizes in two prestigious International Student Cluster Competitions. Well done to all involved”

Simon Michnowicz, Monash HPC team

All teams in the competition were tasked with configuring a resource made available to them on the Chameleon Cloud for each benchmark. Chameleon is similar to the Nectar Research Cloud, in that it provides Infrastructure as a Service to researchers. However Chameleon focus is experiments in edge, cloud and HPC (experiments on the infrastructure itself). The Research Cloud focus is being a resource for, and the instigator of collaboration for all research disciplines. Where Chameleon and the Research Cloud and Monash are particularly similar is being the test bed for new hardware and software technologies pertinent to digital research infrastructure. For example, MASSIVE and Monash’s own MonARCH HPC are built on the Research Cloud.

It is formally the end of the competition. What a journey! You all did an excellent job and we are impressed by how smart, hard-working and dedicated all the teams were. You all deserve a round of applause”

IndySCC21 Chairs Aroua Gharbi and Darshan Sarojini

JohntheRipper cracking passwords

GROMACS simulation of a model membrane

Monash University Joins OpenInfra Foundation as Associate Member

In research, building on the shoulders of others has long meant referencing the contributions of past papers. However, increasingly research-led data & (and the focus here…) tools are more impactful contributions. 

To this end, and after nearly a decade in the making, the eResearch Centre has joined the Open Infrastructure Foundation as an associate member. See the announcement here.

Universities are living laboratories for research-driven infrastructure. They require perpetual & bespoke computing at scale, which when combined, are the killer app for #opensource infrastructure, the associated communities and their practices. 

“Monash University has long believed in the power of using open source solutions to provide infrastructure for research, so it is with great pleasure that we formalize our long relationship and welcome them as a new associate member.”

Thierry Carrez, vice president of engineering at the OpenInfra Foundation, partnership announcement

Over the last decade open data and open source software have established legal entities (foundations) to ensure priorities, quality and sustainability of the data/tool are managed at commercial / real-world levels. Our partnership Open Infrastructure Foundation helps our researchers access tools for their own digital instruments that are in-turn produced, curated and maintained at the rate of global cloud development (across all industries). In this regard we’re amongst a pioneering set of institutions including CERN, Boston University and others. We give back by ensuring our research workloads are driving the community and infrastructure, pushing new technologies and expectations through the ecosystem.

“Open source and in particular the OpenInfra ecosystem is the language by which we craft HPC, highly sensitive, cloud and research data instruments at scale in a way that is closer to research needs, and with access mechanisms that is closer to research practice. We look forward to continued sharing of learnings with the community and pioneering of digital research infrastructure.”

Steve Quenette, Deputy Director of the Monash eResearch Centre, partnership announcement

To provide some indication of impact – 0.5 billion users (including our ~1000 research CIs) using 1.8m servers / 8.4m virtual machines and 4.5m public IP addresses benefit every contribution made by the global community. (From 2020 survey, which is certainly under-reported)

This article can also be found, published created commons here 1

Monash University, NVIDIA and ARDC partner to explore the offloading of security in collaborative research applications

Collaboration in the research sector (universities) has an impact on infrastructure that is a microcosm for the future Internet. 

Why is this? Researchers are increasingly connected, increasingly participating in grand challenge problems, and increasingly reliant on technology. Problem solving for big global challenges, as distinct from fundamental research, can involve large-scale human-related data, which is sensitive and sometimes commercial-in-confidence. Researchers are rewarded to be first to discovery. One way to accelerate discovery is to be the “first to market” with disruptive technology. That is, develop the foundational research discovery tool (think software or instrument that provides the unique lens to see the solution, a “21st century microscope” so to speak). If we think of research communities as instrument designers and builders, they must then build the scientific applications that span the Internet (across local infrastructure, public cloud and edge devices). 

What is an example 21st century microscope for a mission-based problem? To prove the effectiveness of an experimental machine learning based algorithm running on an NVIDIA Jetson-connected edge device controlling a building’s battery. It’s informed by bleeding-edge economics theory, participates in a microgrid of power generators (e.g. solar), storage and consumers (buildings) at the scale of a small city, and is itself connected to the local power grid. Through the Smart Energy City project within the Net Zero Initiative we are doing just that.

A tension is observed between mission-based endeavours involving researchers from any number of organisations, and the responsibility for data governance, which ultimately resides with each researcher’s organisation. Contemporary best practices in technological and process controls adds more work to researchers and technology alike, potentially slowing research down. And yet cyber threats are an exponential reality. It cannot be ignored. How do we make it safe and easy for researchers to explore and develop instruments in this ecosystem? How do we create an environment that scales to any number of research missions? 

What is the technological and process approach that enables a globe’s worth of individual research contributions to mission-based problems that will also scale with the evolving cyber landscape?

In February, NVIDIA, Monash University’s eResearch Centre, Monash University’s Cyber Risk & Resilience team and the Australian Research Data Commons (ARDC), commenced a partnership to explore the role DPUs play in this microcosm. Monash now hosts ten NVIDIA BlueField-2 DPUs residing in its Research Cloud, essentially a private cloud, which itself forms part of the ARDC Nectar Research Cloud, Australia’s federated research cloud, which is funded through the National Collaborative Research Infrastructure Strategy (NCRIS). The partnership is to explore the paradigm of off-loading (what is ultimately) micro-segmentation onto DPUs, thus removing the burden of increased security from CPUs, GPUs and top-of-rack / top-of-organisation security appliances. Concurrently Monash is exploring a range of contemporary appliances, microsegmentation software and automations of research data governance.

Steve Quenette, Deputy Director of the Monash eResearch Centre and lead of this project states:

“Micro-segmenting per-research application would ultimately enable specific datasets to be controlled tightly (more appropriately firewalled) and actively & deeply monitored, as the data traverses a researcher’s computer, edge devices, safe havens, storage, clouds and HPC. We’re exploring the idea that the boundaries of data governance are micro-segmented, not the organisation or infrastructures. By offloading technology and processes to achieve security, the shadow-cost of security (as felt by the researcher, e.g. application hardening and lost processing time) is minimised, whilst increasing the transparency and controls of each organisation’s SOC. It is a win-win to all parties involved.”

Dan Maslin, Monash University Chief Information Security Officer:

“As we continue to push the boundaries of research technology, it’s important that we explore new and innovative ways that utilise bleeding edge technology to protect both our research data and underpinning infrastructure. This partnership and the exploratory use of DPUs is exciting for both Monash University and the industry more broadly.”

Carmel Walsh, Director eResearch Infrastructure & Service, ARDC:

“To support research at a national and international level requires investment in leading edge technology. The ARDC is excited to partner with the Monash eResearch Centre and NVIDIA to explore how to apply DPUs to research computing and how to scale this technology nationally to provide our Australian researchers with the competitive advantage.”

This is an example of the emerging evolution in security technology to security everywhere or distributed security. By shifting the security function as orthogonal to the application (including the operating system), the data centre (Monash in this case) can affect it’s own chosen depth introspection and enforcement, at the same rate that clouds and applications are growing.

“The transformation of the data center into the new unit of computing demands zero-trust security models that monitor all data center transactions in real time,” said Ami Badani, Vice President of Marketing at NVIDIA. “NVIDIA is collaborating with Monash University on pioneering cybersecurity breakthroughs powered by the NVIDIA Morpheus AI cybersecurity framework, which uses machine learning to anticipate threats with real-time, all-packet inspection.”

We are presently forming the team involving cloud and security office staff, and performing preliminary investigations in our test cloud. We’re expecting to communicate findings incrementally over the year.

Disruptive change in the clinical treatment of pancreatic cancer

Professor Jenkins’ research focuses on pancreatic cancer, an inflammation-associated cancer and the fourth most common cause of cancer death worldwide, with an extremely low 5% five-year survival rate. Typically studies look at gene expression patterns between normal pancreas and cancerous pancreas in order to identify unique signatures, which can be indicative of sensitivity or resistance to specific chemotherapeutic treatments.

“Using next generation gene sequencing, involving big instruments, big data and big computing – allows near-term disruptive change in the clinical treatment of pancreatic cancer.” Prof. Jenkins, Monash Health..

To date, gene expression studies have largely focused on samples taken from open surgical biopsy; a procedure known to be very invasive and only possible in 20% of pancreatic cancers. Prof Jenkins’ group, in collaboration with Dr Daniel Croagh from the Department of Upper Gastrointestinal and Hepatobiliary Surgery at Monash Medical Centre, recently trialled an alternative less invasive process available to nearly all pancreatic cancer patients known as endoscopic ultrasound-guided fine-needle aspirate (EUS-FNA) which uses a thin, hollow needle to collect the samples of cells from which genetic material can be extracted and analysed. The challenge then becomes to ensure gene sequencing from EUS-FNA samples is comparable to open surgical biopsy such that established analysis and treatment can be used.


Twenty-four EUS-FNA-derived genetic samples from normal and cancerous pancreas were sequenced at the MHTP Medical Genomics Facility producing a total amount of 40Gb of raw data. Those data were securely transferred onto R@CMon by the Monash Bioinformatics Platform for processing, statistical analysis and computational exploration using state-of-the-art Bioinformatics methods.

super_computer

Results thus far from this study show that data from EUS-FNA-derived samples were of high quality and also allowed the identification of gene expression signatures between normal and cancerous pancreas. Professor Jenkins’ group is now confident that EUS-FNA-derived material not only has the potential to capture nearly all of pancreatic cancer patients (compared to ~20% by surgery), but to also improve patient management and their treatment in the clinic.

“The current clinical genomics research space requires specialized high performance computational and storage infrastructure to support the processing and long term storage of those so-called “big data”. Thus R@CMon plays a major role in the discovery and development of new therapies and the improvement of Human health care in general.” Roxane Legaie, Senior Bioinformatician, Monash Bioinformatics Platform